


These were enough to get me going. Other than general dimensions I really had no idea what the hoist would look like when completed. I had no solid plan - I was just going to start building and see where I land. One goal I had for this project was to use what I already had on hand. I wanted to see if I could force my creative juices by NOT buying any specific supplies for this project.
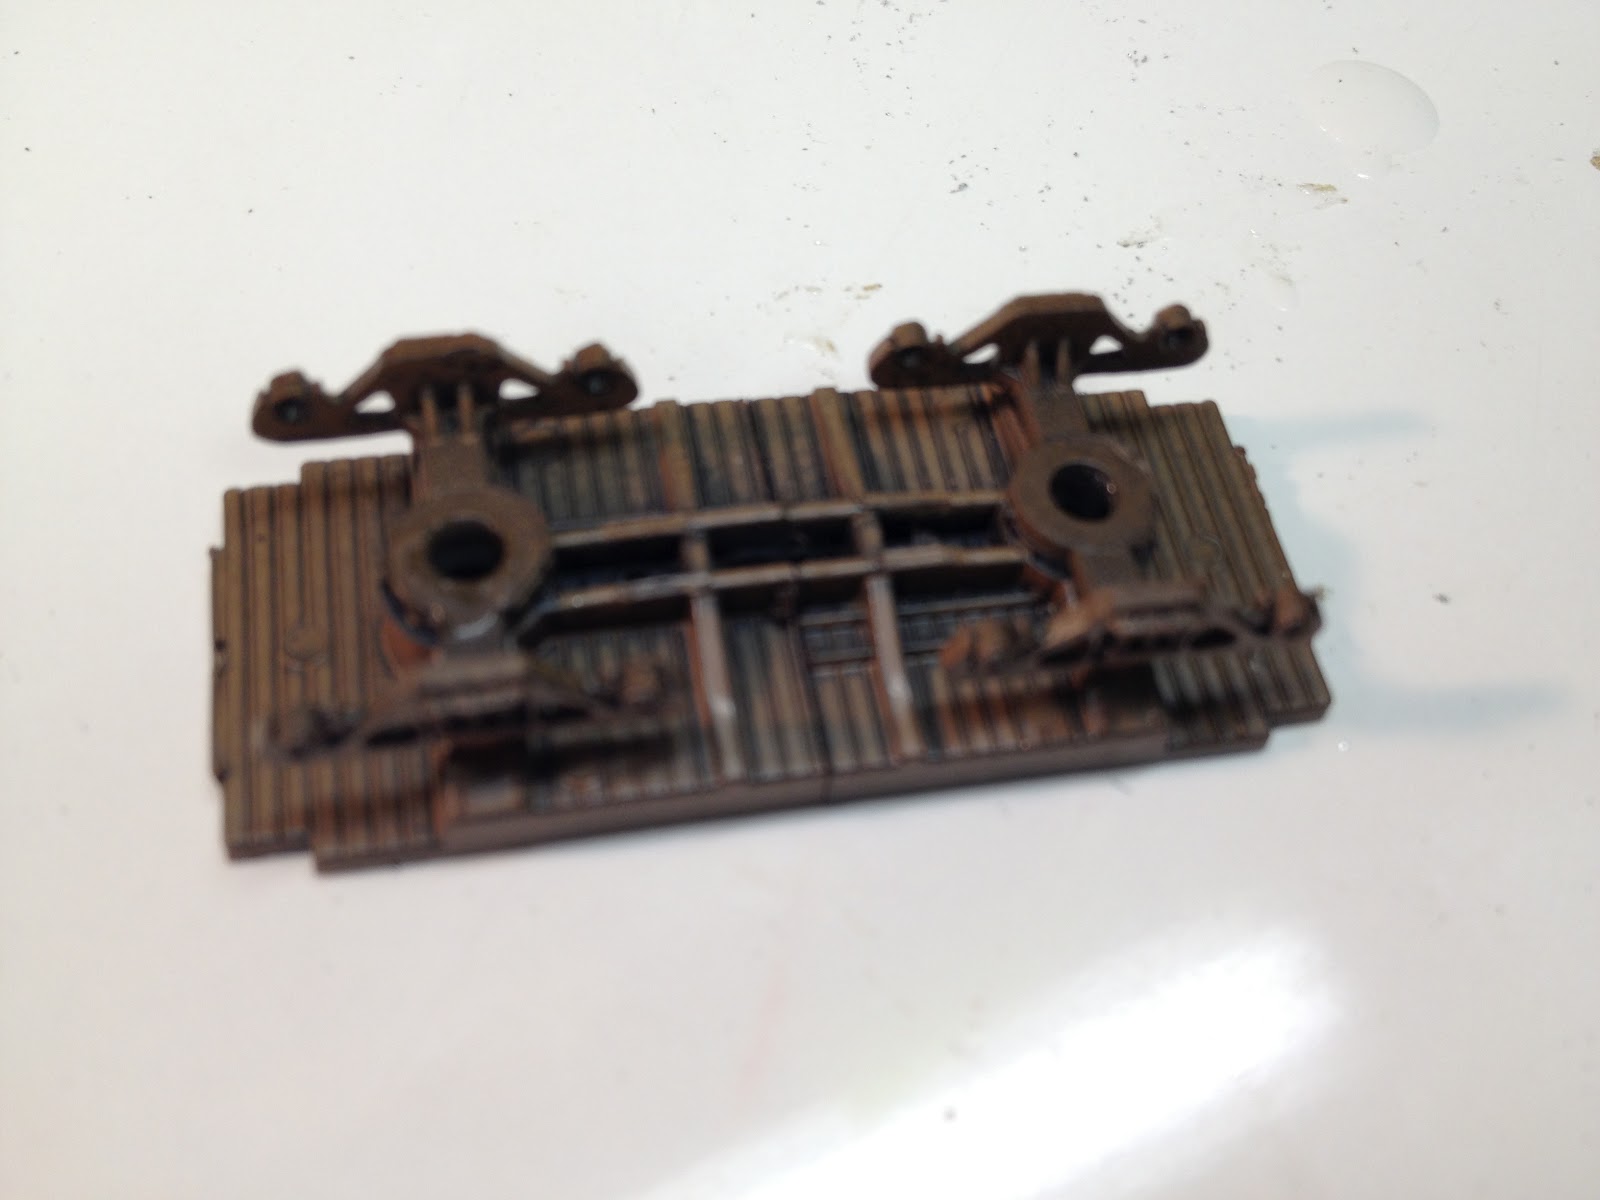
I started by grabbing an older boxcar's base.

I then cut out the center section.


And then glued the 2 ends together.


I then gave it a spray of brown paint and glued the trucks on. I glued the trucks because they would not need the ability to turn and it saved me from figuring out how to screw them together.

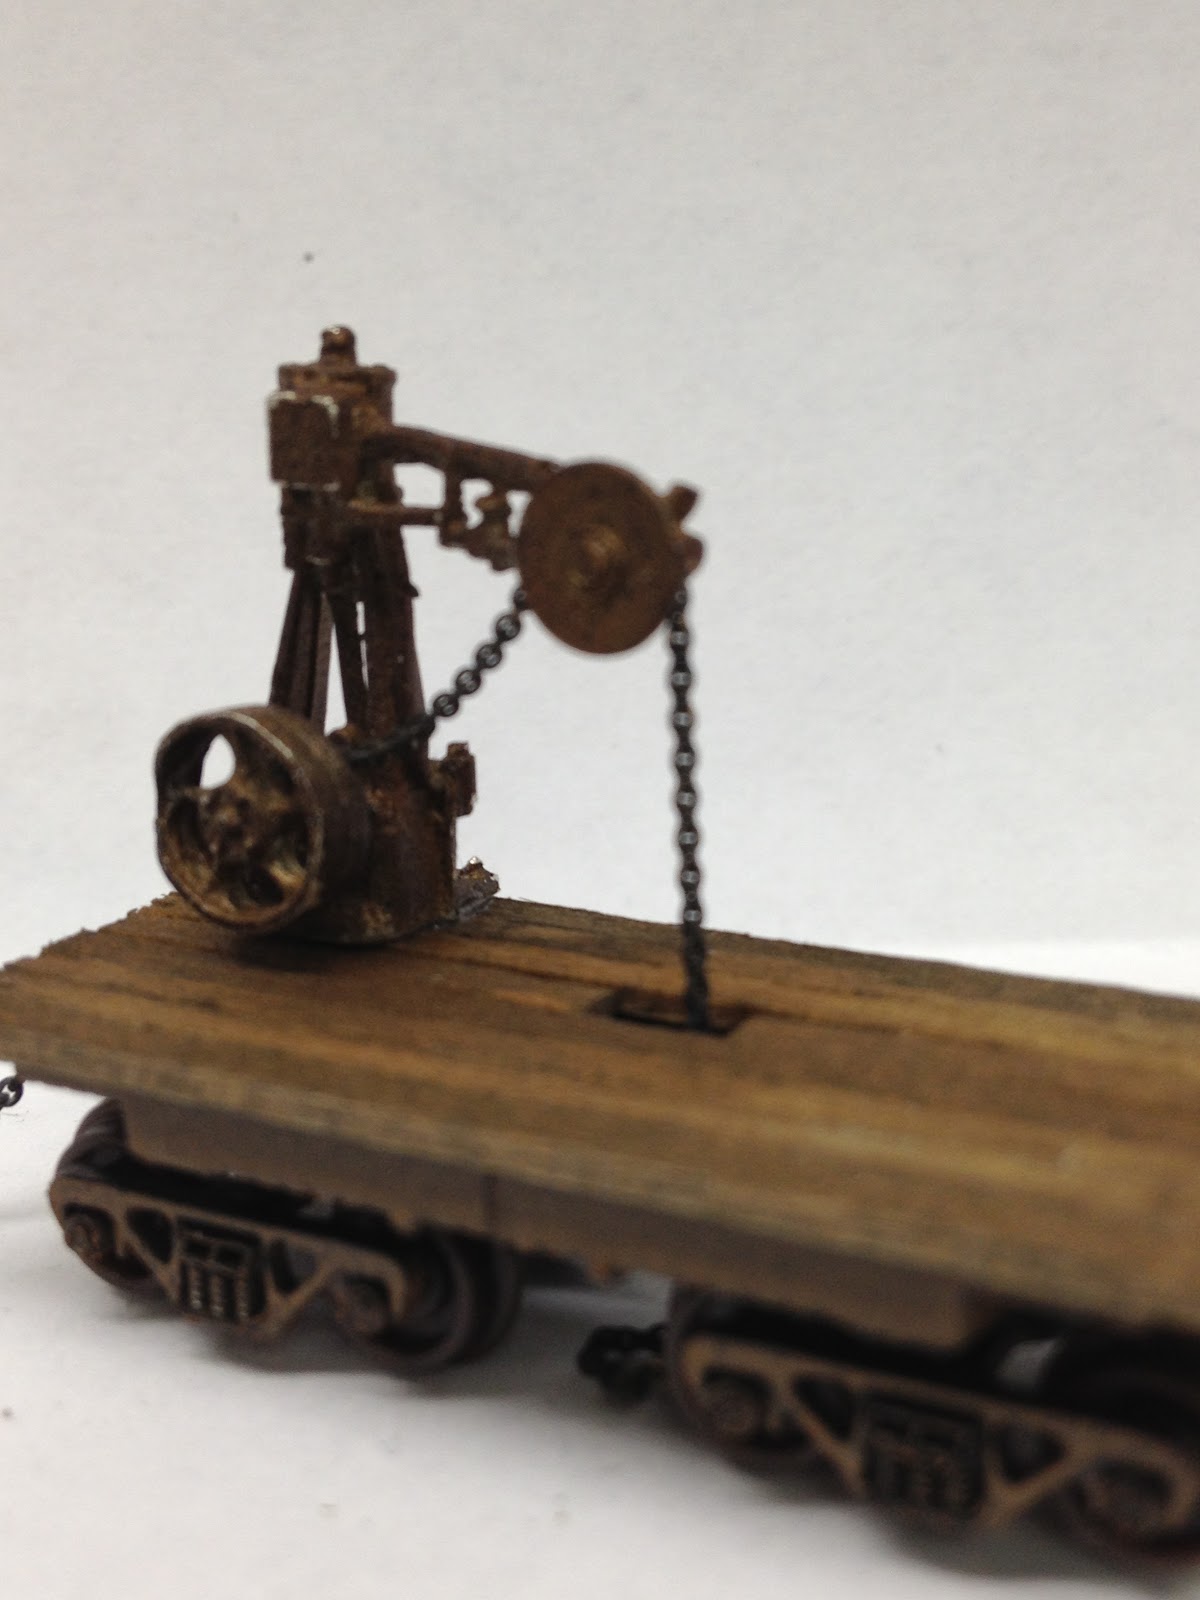
Next I grabbed some of the left-over timbers from Smittie's Engine Shed project, cut to length, and glued to form a platform.


You may have noticed the hole in the platform. There is a corresponding hole in the base between the trucks. This hole is for the pass through of the hoist's lift cable (more on this later).
Note: For my gluing purposes I generally use 1 of 2: super glue or wallpaper seam adhesive I will use the superglue for metal items and the seam adhesive for wood. I like the seam adhesive because it works like regular white glue, dries very quickly, and is water resistant once dry.
In order to actually lift things I needed some type of motor. I dug around my parts bin and found these items. Two belong to a HO scale saw mill and the other from a clock.

A little superglue and paint results in this:


So far, so good. Now time to start the structure. First I needed to build the hoist/car platform.


Time to put some rails on.


Let's set it up for a test run and see how things are looking.


So far, so good. We need to keep it from rolling off the end. I glued a section of rail to either end.

Add some corner bracing to keep it from crashing down.

The rolling platform will be moved back-and-forth via chains and a motor on either end.


To aid in moving the hoist platform back-and-forth I glued a chain to either end of the platform and let the ends hang over the sides.


Needing some way to pull the chains to move the platform I glued a 'motor' onto either end and will let the chain hang over that and attach via a sprocket which is too small to see.

I grabbed some kind of scrap metal stuff - engine pipes I guess - and made an electrical conduit to drive the motors. I gave it some paint before gluing it in place.


I decided to build some walking platforms.


I had to drill a small hole in the top end of the hook which to glue the chain into.


Add a little paint...

I then glued the chain to the hoist assembly and then glued the hoist assembly to the platform.


For fun I added a few more items to the scene and took these pictures.


